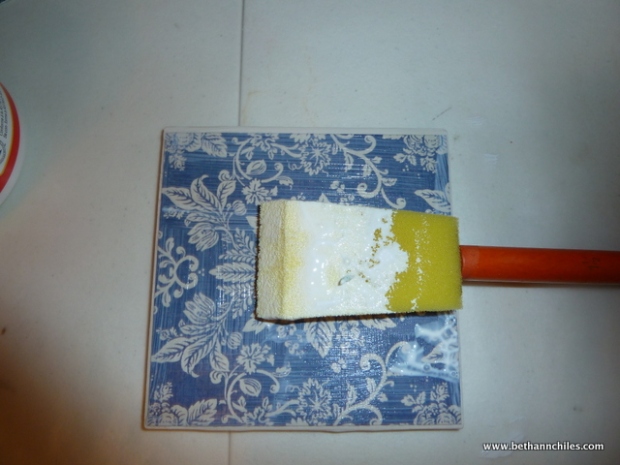
 I have been making coasters like crazy lately. I need to find some people to give them to. Any takers out there? I first saw the idea on Pinterest and decided to give it a go. I have been using the ones I made first for awhile now and they are holding up just fine so I think the process is pretty good and the adjustments I have made to make them a bit better seems to be working. How about a step by step for those of you crafters out there who want to try?
Your shopping list includes the following items:
- 4 x 4 ceramic tiles available at your local home improvement store—the cheap ones work fine—only around 10 cents each
- ModPodge –available at any craft store
- Scrapbook paper or any kind of paper or photo that you would like to use—-the paper does need to be fairly heavy weight—the thin stuff crinkles up when the ModPodge is applied and wrinkles.
- Rubber cement–also at craft store
- Cork for backs—can use felt but I found the cork is more durable and just looks nicer. You can get precut cork at places like Hobby Lobby or cut your own from a roll.
- Brushes for applying ModPodge.
- Heat resistant clear coat paint if you want to be able to use them for hot beverages. I went to my auto store and got clear engine paint. None of my drinks get up to 500 degrees so I think I am safe!
Assemble all your items and get ready to have fun. I use wax paper on the table surface to protect from my messiness.
Cut your papers into 4 by 4 inch squares for the tiles. If you decide to make trivets and use larger tiles just adjust your measurements to fit those. I also used a corner punch to round out some of the corners on a few of the coasters for a different look.
Coat each tile with a nice coat of ModPodge, place paper on and proceed to ModPodge the top of the coaster. I usually do 3 coats, allowing time to fully dry between the coats. It will dry clear so don’t worry—I did not have a problem with brush strokes but I imagine it depends upon what type of brush you use and how heavy you slather on the ModPodge.
Make sure you allow the ModPodge to fully dry before doing the next step. I usually allow them to dry at least a day before applying the clear coat.
Very important—USE THE CLEAR COAT IN A VENTILATED AREA!!!!!! Outdoors is best. Spray each coaster thoroughly and allow to dry for at least a day before putting the backing on the coasters. I placed mine on a covered cookie sheet to allow for easy transport!
When the tops have dried thoroughly coat the back of each coaster with rubber cement and affix backing (cork) for a finished product. If you plan to use for hot beverages make sure to let them “cure” for a week or so—that allows the sealant to really dry completely and you won’t have issues with your hot cup sticking to the coaster.
The most important thing is to use engine paint and let it “cure” for as long as possible. If you don’t your hot cups will stick to the coaster. I have not had any problems with any that I have made and I use them every day ,
You can also use larger tiles and make hot pads—choose some holiday paper and you have a great hostess gift. Easy DIY present that can be personalized for each recipient by choosing paper that coordinates with their decor or their hobbies. I have gotten so many compliments on these and love that they are so easy to make.
Hope you enjoy making them. I would love to hear how they work for you!


